
Here are some art projects for the first week of Pre-K and Kindergarten that I think you and your kids will enjoy! They are all here for you to download FREE, so I hope that you will use them in good health, and let your friends know where to find these free art projects for K and Pre-K as well!
I don’t know when all of you start school, but it always seems like summer is over in the blink of an eye and then the first day is here. I’ve been wanting to share these first week art projects with you for a while, and this seems like a good week to do it! I honestly don’t know where most of them came from originally; they were passed down to me from “the teacher that came before me.” All I did was clean them up a little so that I could pass them along to you. I hope you enjoy them. I have more that I plan on posting over the next few weeks, so if you haven’t signed up for the updates, you might want to do that! I’m also hoping to blog on what I do during the first week of school as I train my students to just “be” in school. I hope that you find the other information useful, too!

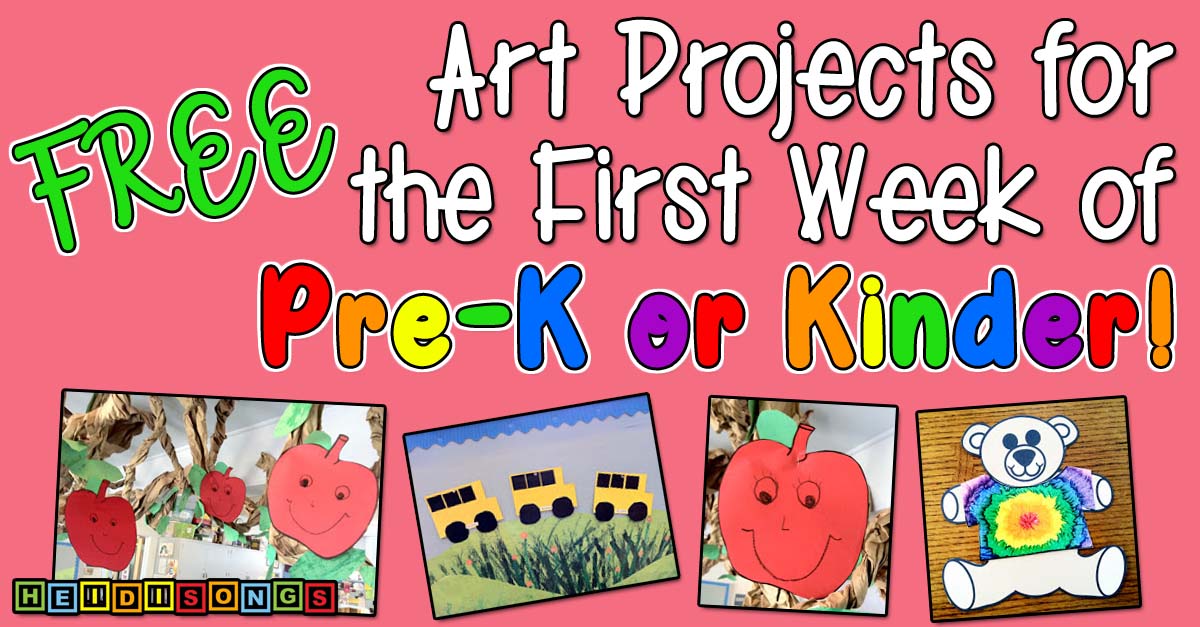
This is a wonderfully simple project that is always a hit with my students, no matter what! Plus, it makes a great bulletin board as well. There’s not even very much cutting that the children have to do, because most of it is pre-cut squares and rectangles. They just cut out the inset where the window would be, snip off the corners of the squares that will form the wheels, and glue it all together. No matter how the buses turn out, they always look cute on the bulletin board! To download the pattern, click here. For info on making the flowered background that they are stapled on, see my blog entry on called "We're Bugging out All Over".
I like this project because you can really get a good glimpse into your new students’ visual perception skills based on how they are able to put those buses back together. Plus, once you get them stapled up on the walls all in a row, you’ll have a very good visual image of how your students compare in this area. I like to have them up for Back to School Night so that parents can see them also.
2. Helper Bear and Shirt

Each year, I have the children decorate a T-shirt for my helper bear that I keep on my wall. Then I laminate the shirts and put a name sticker on them. Each day, I choose one shirt from the stack and paper clip it to the shoulders of the teddy bear cut out that is stapled to the wall. The child whose name is on the shirt gets to be the helper of the day, of course, and helps with anything at all that I need. That child also gets to be the line leader. To download both the bear and the t-shirt, click here.

To make the shirt, simply copy it on white cardstock so that it will be nice and sturdy to clip on the bear all year. You can let them color it with crayons or paint it with water colors, or do anything you like with it! The only thing I do always tell the children to do is to try to cover the whole, entire shirt so that there is no white part left on it at all. The sample shirts that you see in the pictures were made with a set of oil crayons called “Smooth and Silky Art Sticks” that I got from Discount School Supply a few years ago. They slide on nicely and the colors mix well; however, they are quite messy, so keep some baby wipes handy! They really do get all over the children’s hands, faces, and the tables. They do look exceptionally beautiful, though, when laminated! And trust me, laminating is totally necessary if you want to be able to touch and use the shirts and they were decorated with this type of crayon or you’ll have it all over your fingers every time you change the shirts, too. By the way, you can get the same kind of color mixing effect if you use regular crayons on a hot plate, but then each child will need one-on-one adult assistance when using it to make sure that they do not get burned.

It seems as though just about every Kindergarten classroom has a tree, and mine is no exception. I tried to give my tree lots of vines, and I wind up adding more each year during our zoo unit so that monkeys can be hanging from them. But in the fall, apples are on those branches, of course! I have had the children make apples two different ways. The first is simply by giving them a rectangle and having them cut off the corners to form a circle. Add a green leaf and it will look like an apple when you put it in a tree! The other way to do it is to xerox an apple shape, have them trace it and cut it out, and then hang it up. I like this way best because it winds up looking more like an apple. But the first way also works fine, especially when the xerox machine is broken! To download my apple pattern, click here.

You can also find three more projects here at this link:
More Art Projects for the Beginning of the Year.

----------------------------------
Follow me! Did you enjoy this post? Do me a favor and share it with your friends! And follow this blog by signing up for my email updates, or follow on Bloglovin', or follow me on TPT! I'm also on Pinterest, Facebook, Twitter, Instagram, Google+ and YouTube, too! Don't forget to sign up for our email newsletter (at the bottom of this page) for special deals and promo codes that you won't find out about anywhere else.


