








Here is a fun little experiment with candles, and some lessons about fire that primary children will find truly fascinating! My kindergarten class really enjoyed this lesson, and many of them chose to re-do the experiment over and over again at their playtime, (under my supervision, of course!) This should also be a great lesson for pre-K and first or second grade students as well.

But first, here is an update on what I’ve been doing.
Ah, vacation is lovely! This extra week of being on vacation is as nice as that extra week of being in school right before Christmas was hard- if that makes any sense at all! I am soaking it all in, because January is absolutely filled to the brim with lots of great teaching activities in the classroom, plus conferences to go to as well! Next week on Friday, I will be doing an on-site training at a preschool in the Dallas area. So here’s a shout out to the Lamb of God Early Childhood Ministry in Flower Mound, Texas! I can’t wait to meet you all! Then I am flying (lickity split!) from Dallas to San Francisco that evening so that I can present at the California Kindergarten Conference, opens in a new tab in Santa Clara, CA! My husband will pick me up at the airport, and I will be doing two presentations there on Saturday afternoon. If any of you would like to attend, I will be presenting “Developmentally Appropriate Ways to Get Kids Writing,” and also on teaching kids the alphabet with my Singable Songs for Letters and Sounds, opens in a new tab CD/DVD.
At the end of this month, I will be presenting in Addison, TX, at SDE’s Conference for Texas Kindergarten and Pre-K Teachers, opens in a new tab, and then at SDE’s Conference for Mississippi Kindergarten Teachers! For a full list of all of the conferences that I will be presenting at this year, please click here, opens in a new tab. There are a bunch! And did you know that I do staff development presentations for individual districts, as well as at educational conferences? I would love to come to YOUR district and meet YOU!
So now I am going to tell you about some experiments that we did with candles during that last week in school before Christmas vacation.
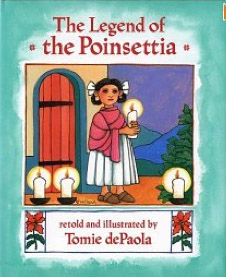
I always like to read a fiction book to launch a discussion in science whenever possible, just as a means to pique their interest. And this time, I used the book, The Legend of the Poinsettia by Tomie de Paola. I usually use this book to introduce the poinsettia and then do a poinsettia craft, opens in a new tab, but this time I used it to launch a discussion of candles and fire, since there are lots of images of candles in this book.
I got the idea for the first experiment from Pinterest! There are SO many great ideas to be found there! So I recreated this experiment to show children what fire needs in order to burn. The idea is that children should learn that fire needs heat, air, and fuel, and without any one of these elements, it will go out.
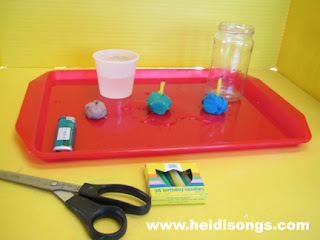
All you need are some birthday candles, something to hold them up, such as modeling clay or “Floam,” and a lighter. You’ll also need a pair of scissors to cut one of the candles down to the end, otherwise you’ll have to let your class sit and watch for a good long time while that last candle burns completely out! I cut mine down to about half an inch, and even that took a good four minutes to burn completely out, so if your class’ attention span is short, then cut it the shorter the better! Then get a glass jar and remove the label so that everyone can see what is happening inside of it, and a glass of water. Also, be sure to keep a fire extinguisher and a bowl of water handy, just to be on the safe side!
Start by making sure that your students know that this is not a game and that they must NEVER play with matches or fire. This is about how to put OUT a fire, and why “Stop, Drop, and Roll” works. Light all three candles. And then…

Place the glass jar over the top of the first candle and watch the flame go out. Ask the children why it went out. Hopefully they will guess that it ran out of air!
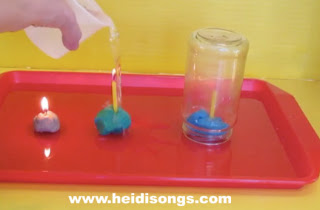
Then pour a cup of water on the second candle and watch it go out. Ask the children why it went out, and hopefully they will guess that it had no heat! (You could also argue that we took away the air for a moment, but I guess that’s debatable!)
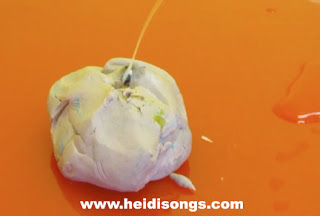
Then let that last candle burn down to nothing. It should be pretty obvious to the children why it went out; there was nothing left to burn! The only thing my class lacked was the word “fuel” and a way to describe what had happened. “Fire needs fuel in order to burn. If you take away the fuel, it cannot burn.”

All of this will be leading to a discussion that we will be having in January about why “Stop, Drop, and Roll” works: if your clothes catch on fire, when you roll yourself around and around, you are taking away the fire’s air, and it needs air in order to burn. Makes sense, doesn’t it? I think that once kids understand this principle, they will be far more likely to remember to do, and should be safer, at least in theory!
Here’s a quick video of our experiment. I cannot show you the one we did in our classroom, due to district rules, but I can tell you that the children were entirely fascinated and absolutely LOVED it! Some of them loved the experiment so much that they wanted to repeat it over and over again during their playtime, which we did, with my supervision, of course!


