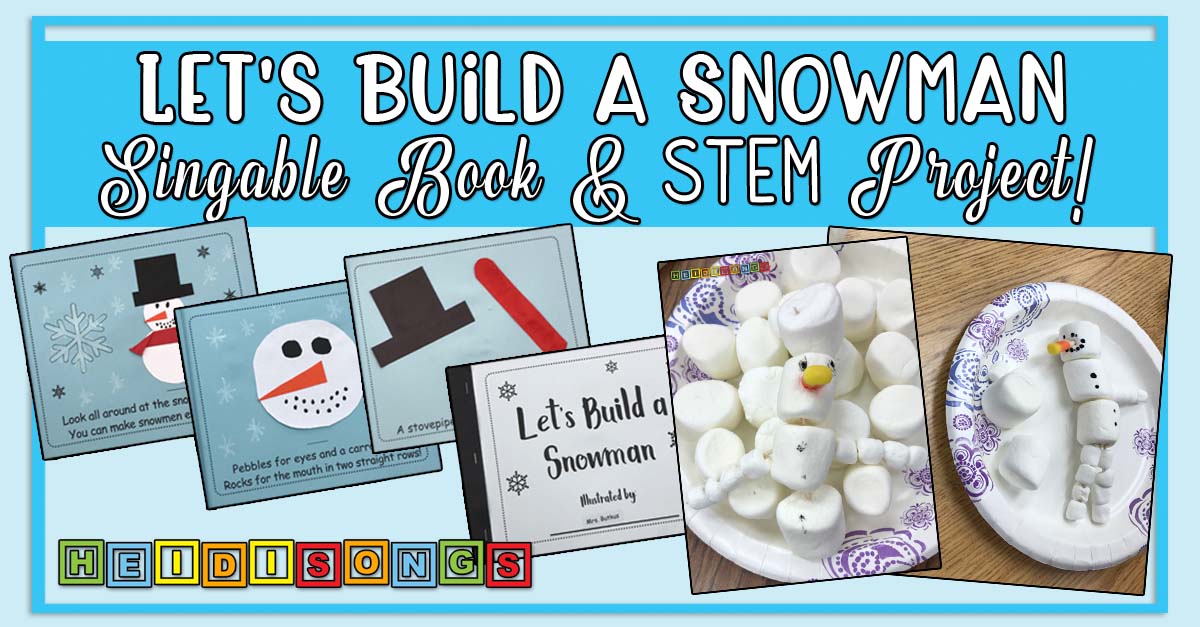
I am excited to share TWO really fun winter ideas with you: our Let’s Build a Snowman Singable Book Project for kids to make & read, and a fun, new STEM idea for your little ones: a Marshmallow Snowman!

Some of you might remember this little Let’s Build a Snowman book when we released it a few years ago, and the movie below shows it as I originally created it. However, I decided to update the book to meet my class’ needs a little better and make it less repetitive. So the file now contains both the version you see in the movie below, and the shortened version shown in the pictures that follow it.
To shorten the book, I decided to put the body and head together on page one for the text that reads, “First comes the body, and then comes the head.”

Then, I put the hat and the scarf together on page two, and enlarged them both to fill the page better. (My TKs were able to do both of these pages together on day one of making the book!) The text on this page reads, “A stovepipe hat and a scarf of red.”

After that, page three has an enlarged snowman head and the eyes, nose, and mouth with the text, “Pebbles for eyes and a carrot nose! Rocks for the mouth in two straight rows!”

Finally, page three has a snowflake for the kids to color, and the children will make one entire snowman on this page with the text, “Look all around at the snow in the air! You can make snowmen everywhere!”

I like this version much better because it’s just not as repetitious for the kids to make, and I think it’s a better use of our time. But the original version is still there!
For only $4, you get an MP3 file of the Let’s Build a Snowman Song AND the complete master, pictures, and detailed instructions you need to make this CUTE singable book! Click here to purchase!!!
Now, as far as the Marshmallow Snowman STEM Project is concerned, let me tell you how it is done! 
Each child needs:
-10 large marshmallows
-10 small marshmallows
-1 candy corn
-1 plate
-15-20 toothpicks (at LEAST)
-1 paper bag (for storing leftovers)
– Basically, you need 200 marshmallows for 20 kids, so I collected four bags of large marshmallows and two bags of small marshmallows. Parents donated everything. I had volunteers put marshmallows in zip bags for the kids ahead of time, but I realized later that I gave them too much (double that amount!) so I modified the instructions for you here. Ten large and ten small marshmallows each is just fine! I gave each child 15 toothpicks, but it wasn’t enough for some of them! Keep extras on hand. Somehow we went through a box of 800 toothpicks for my class and their buddies, a total of 43 kids.

-I had tiny dressing cups from the dollar store for the little bit of food coloring they needed, which was applied with a toothpick. They built their snowmen on a paper plate. I showed everyone how I built mine under the document camera, but told them they could do it however they wanted.

-They needed paper bags to save their leftovers because they had trouble removing some of the toothpicks, and other kids just didn’t want to take their snowmen apart because they wanted to take them home to show their parents. It was also hard for the kids to put them back into the zip bags due to the toothpicks, and that’s why I pulled out the paper bags. And by the way, nobody had a single issue with the toothpicks. There was no “stabbing,” etc. However, I did tell them that if they misused the toothpicks, they would be OUT. :0

– If I could have thought of a way to make an edible hat for the snowmen, I would have given them those materials, too. Perhaps a cracker or something cube shaped? What do you think?

That’s it! The lesson took about a half an hour, and they were all very STICKY when they were done- as were my tables! LOL!
– Heidi 

----------------------------------


