


 For Your Classroom
Perfect If Your Room is Set Up Correctly
Pros: price
Cons: Room Configuration Issues
Best Uses: Whole Group Teaching
 |
| The Now! Board includes a small laser that projects onto the center of your screen. |
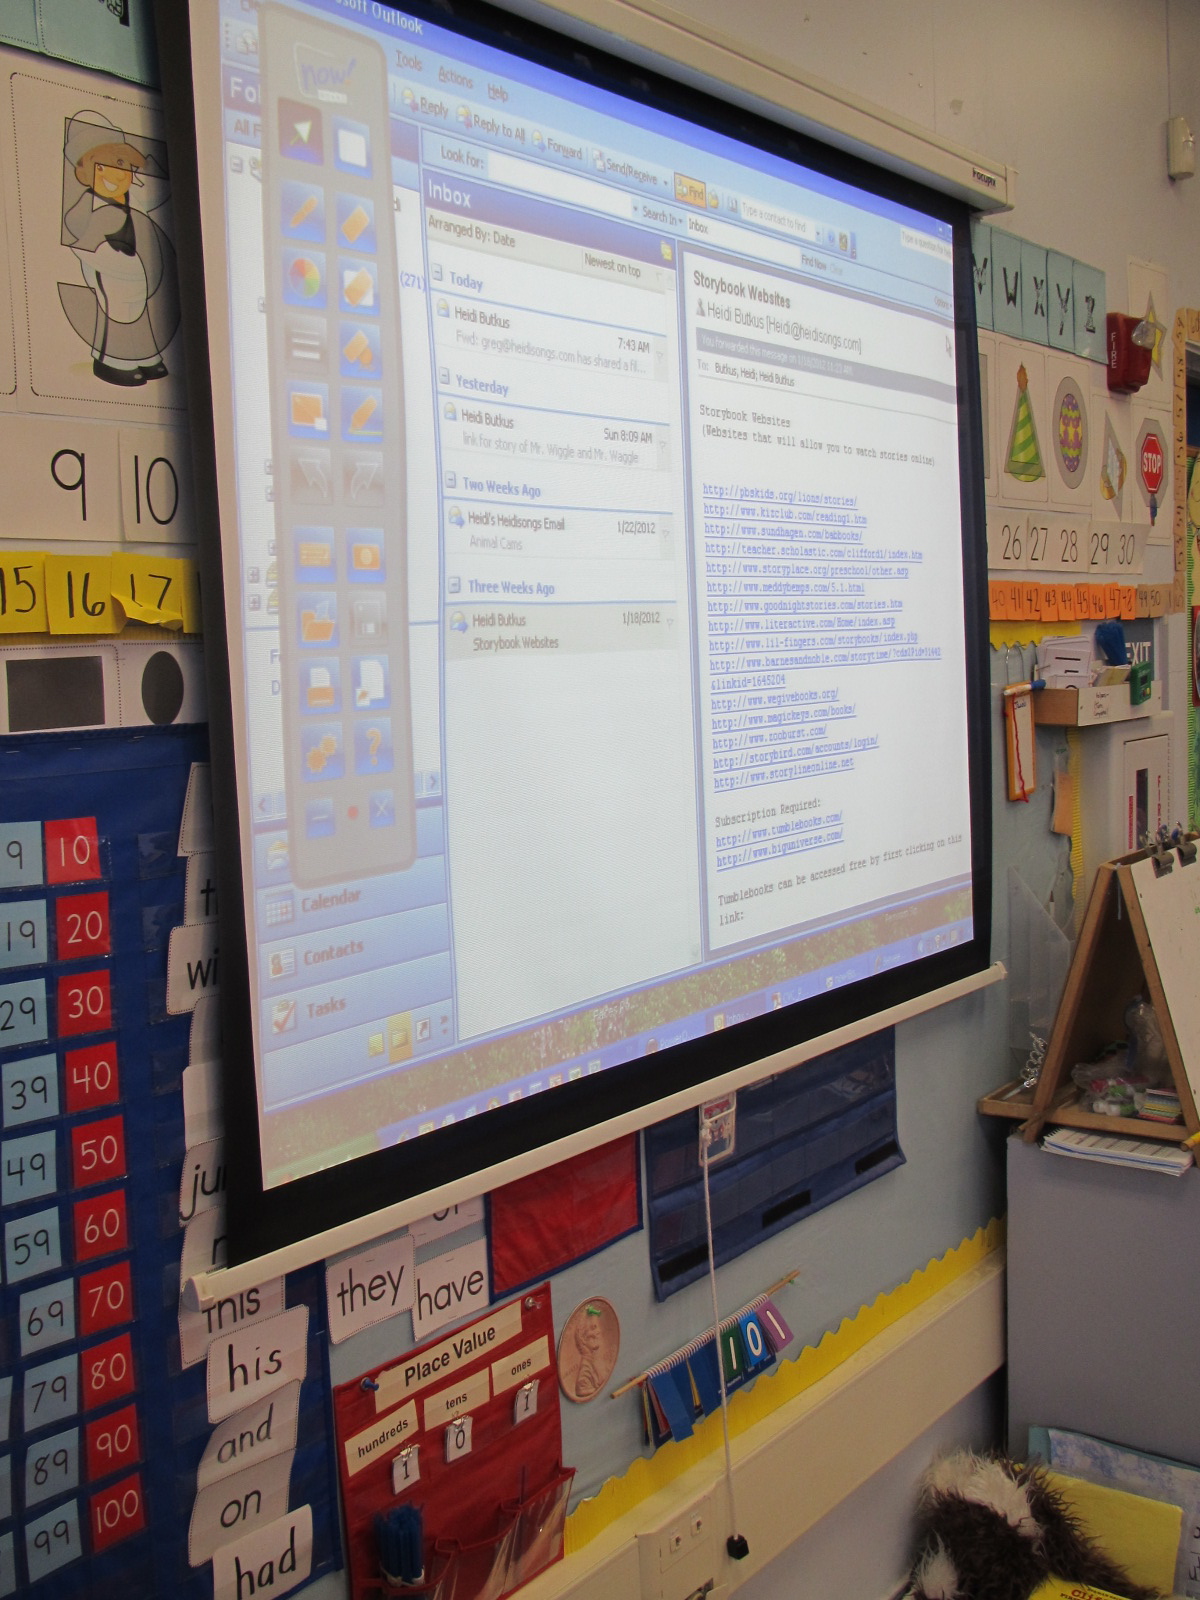 |
| The screen in my room has a lot of “stuff” behind it, including a cover for some wires that was added during our school’s modernization. So, it moves every time you touch it! That makes it impossible to calibrate the Now! Board. |
1. A hard, flat surface to project on.
2. A place for your computer, projector, and the Now!Board laser to rest on that is about 8-12 feet in front of your screen.
Each time you set it up, be prepared to spend a minute re-calibrating your screen. It’s not hard, it just takes 60 seconds, but it has to be done. It also has to be done again if somebody knocks the laser down or moves it. But these are really the only disadvantages of the unit! Other than that, you can do anything with it that you can do with any interactive white board! It’s a wonderful, interactive tool, and it would be a great addition to any classroom, provided that your room configuration will allow for its use.
Heidi Butkus
 |
| The laser needs to be set up 8-12 feet from the screen. |
Look at the picture, and you can see how far I had to push the computer table over and stretch the cables as far as they would go in order to make use of the Now! Board. My students usually sit where the computer table is in this photo, and then I had to stretch the cord over and set the laser onto a chair to try it out. I did get the board calibrated for a short time. Then once I touched the screen hard enough to make it move, the board had to be re-calibrated again. Of course, the children are usually seated where those cords are stretched across, so they would probably be touching that cord and therefore moving that laser that projects onto the board. This would cause the whole thing to need to be re-calibrated again.
The solution to this problem would be to purchase a VERY long cable and thread it through the ceiling and have the district mount the laser up by the projector, which is also mounted on the ceiling. The only problem with this is that there is no money for the project, and then there is the problem of the screen… So I decided to let it go and give the unit to a colleague that has the perfect room set-up for it! She was absolutely THRILLED! And I am jealous- but happy to have done a good deed. I will enjoy watching that class learn to use it and learn from it!
 |
|
The cords that come with it are a bit short. You may need to purchase longer ones.
|


