Happy New Year! Here's a FUN winter themed post from a few years ago when I wasn't teaching remotely. I hope you love it! :)
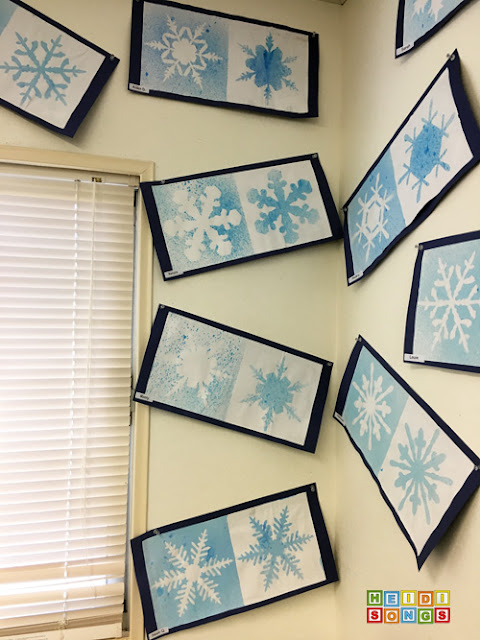
In this post, I am going to share how to make some beautiful positive/negative spray painted snowflakes! I adapted this idea from something similar I saw done on Instagram, but with fall leaves instead of snowflakes. I absolutely LOVED the idea, (I even pinned it here!) so I thought it would be fun to adapt it and see if I could come up with something new to put on our wall for winter. It’s about time I changed that bulletin board, anyway!
For this project, I had to purchase some snowflake stencils on Amazon. This set by Roylco came with twelve different plastic snowflake stencils in it for about fifteen bucks. I was tempted to purchase the leaf stencils just to have for next year, but somehow I managed to resist. In any case, I think it’s important that the stencils are made of plastic so that you can rinse them off and reuse them after painting. Otherwise, if they are cardboard, you will probably end up ruining them by spraying the paint over them, and that’s no good!
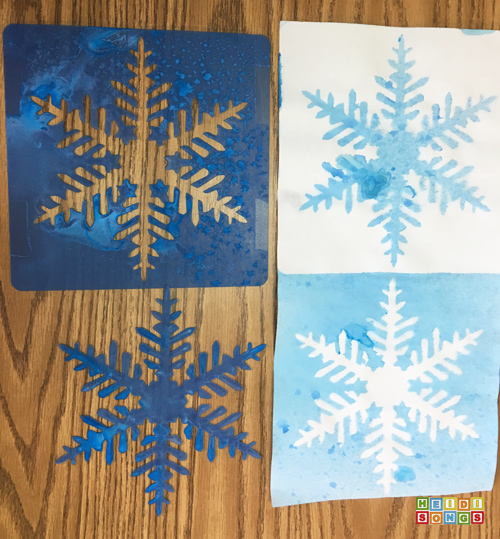
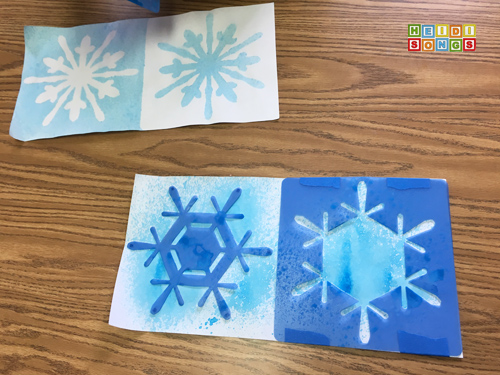
The process itself is pretty easy. All you need to do is measure the size of your stencils and cut the paper so that it is even with the stencils as shown in the picture. Cut one paper for each child. We put the names on the backs of the papers in advance, because that helps me remember to do one for each child without missing anyone, even if they are absent the day we do them. It’s important to me to have everyone represented on my bulletin boards!
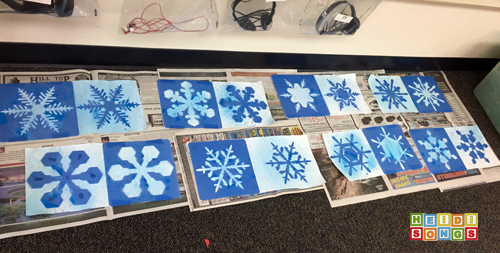
Now comes the only time consuming part: someone needs to tape down the snowflake stencils in advance. I had volunteers help me with that part, but if you don’t have any volunteers, I bet that some fifth graders would be happy to help. The fifth grade teacher at my school is always happy to give her faster workers projects like this, as long as I give her plenty of time to get it done! Now, one problem is that I had ten stencils to work with and 19 kids, so I had to do half of the class one week and half of the class the next week. Of course, some of the kids were a little confused about this even after I explained it, but they understood why they had to wait in the end!
You’ll need to get your paint ready, too! We were going to use liquid watercolors, but that limited us to only the one color of blue that I had on hand, and I really wanted to mix light blue with dark blue. So we decided to get some tempera paint and add a lot of water until it looked like liquid watercolors! We used the bright blue aqua tempera and the regular darker blue the kids normally paint with, mixing it with a LOT of water! Note that the original Instagram post with the fall leaves indicates that this can be done with food coloring and water as well! Once both colors are prepared, just put them into a couple of spray bottles and spray them into the sink until the consistency of the paint looks correct. Then try it on some paper to make a sample. If it works well, you’re good to go!
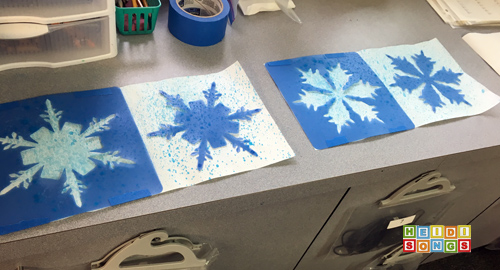
Now comes the fun part: doing it with the kids! My favorite way to do this is to call the kids back two at a time, with one watching and the other painting. That way, I only have to explain things once for every two kids. (You could probably do three at a time just as easily.) Then they switch! The spraying takes almost no time at all, and it’s fun for them! They just needed to be coached to spray quickly, pulling the handle back fast, which made the tiny droplets. I had my kids practice spraying into the sink, which really helped a lot, and also got them “over it” a little bit, if you know what I mean! Once they had it, they were able to spray their snowflake. One child sprayed sooooo much that he saturated his paper and had to redo his snowflake later. So, I recommend that you give them a certain number of sprays and then tell them that they MUST stop after that.
Next, just let the papers dry for a couple of hours. Once they are completely dry and there is no chance of any paint dripping or spreading, then you can pull off the stencils. The kids LOVED to see the paintings as the stencils were removed! If you have the time, it’s really a nice thing to call each child back and let them watch as an adult pulls their stencil off.
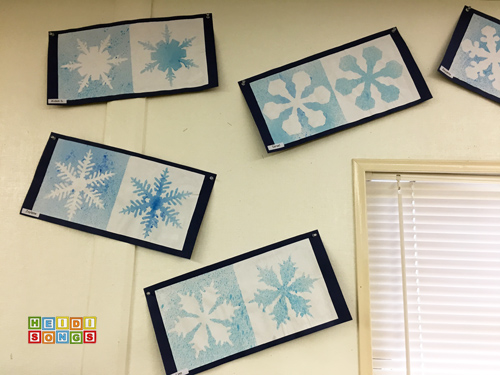
Of course, they don’t NEED to be “framed” with paper on the back as I did, but the white snowflake papers weren’t showing up very well on my white wall, so the framing seemed necessary to me.
I hope that you enjoyed this post and may even try it yourself! Let me know how it goes, and I would LOVE to see a picture if you make some! Happy New Year!
-Heidi
----------------------------------
Follow me! Did you enjoy this post? Do me a favor and share it with your friends! And follow this blog by signing up for my email updates here, and follow me on TPT! I'm also on Pinterest, Facebook, Twitter, Instagram, and YouTube, too! Don't forget to sign up for our email newsletter for special deals and promo codes that you won't find out about anywhere else.
For this project, I had to purchase some snowflake stencils on Amazon. This set by Roylco came with twelve different plastic snowflake stencils in it for about fifteen bucks. I was tempted to purchase the leaf stencils just to have for next year, but somehow I managed to resist.
 In any case, I think it’s important that the stencils are made of plastic so that you can rinse them off and reuse them after painting. Otherwise, if they are cardboard, you will probably end up ruining them by spraying the paint over them, and that’s no good!
The process itself is pretty easy. All you need to do is measure the size of your stencils and cut the paper so that it is even with the stencils as shown in the picture. Cut one paper for each child. We put the names on the backs of the papers in advance, because that helps me remember to do one for each child without missing anyone, even if they are absent the day we do them. It’s important to me to have everyone represented on my bulletin boards!
Now comes the only time consuming part: someone needs to tape down the snowflake stencils in advance. I had volunteers help me with that part, but if you don’t have any volunteers, I bet that some fifth graders would be happy to help. The fifth grade teacher at my school is always happy to give her faster workers projects like this, as long as I give her plenty of time to get it done! Now, one problem is that I had ten stencils to work with and 19 kids, so I had to do half of the class one week and half of the class the next week. Of course, some of the kids were a little confused about this even after I explained it, but they understood why they had to wait in the end!
You’ll need to get your paint ready, too! We were going to use liquid watercolors, but that limited us to only the one color of blue that I had on hand, and I really wanted to mix light blue with dark blue. So we decided to get some tempera paint and add a lot of water until it looked like liquid watercolors! We used the bright blue aqua tempera and the regular darker blue the kids normally paint with, mixing it with a LOT of water! Note that the original Instagram post with the fall leaves indicates that this can be done with food coloring and water as well! Once both colors are prepared, just put them into a couple of spray bottles and spray them into the sink until the consistency of the paint looks correct. Then try it on some paper to make a sample. If it works well, you’re good to go!
Now comes the fun part: doing it with the kids! My favorite way to do this is to call the kids back two at a time, with one watching and the other painting. That way, I only have to explain things once for every two kids. (You could probably do three at a time just as easily.) Then they switch! The spraying takes almost no time at all, and it’s fun for them! They just needed to be coached to spray quickly, pulling the handle back fast, which made the tiny droplets. I had my kids practice spraying into the sink, which really helped a lot, and also got them “over it” a little bit, if you know what I mean! Once they had it, they were able to spray their snowflake. One child sprayed sooooo much that he saturated his paper and had to redo his snowflake later. So, I recommend that you give them a certain number of sprays and then tell them that they MUST stop after that.
Next, just let the papers dry for a couple of hours. Once they are completely dry and there is no chance of any paint dripping or spreading, then you can pull off the stencils. The kids LOVED to see the paintings as the stencils were removed! If you have the time, it’s really a nice thing to call each child back and let them watch as an adult pulls their stencil off.
Of course, they don’t NEED to be “framed” with paper on the back as I did, but the white snowflake papers weren’t showing up very well on my white wall, so the framing seemed necessary to me.
I hope that you enjoyed this post and may even try it yourself! Let me know how it goes, and I would LOVE to see a picture if you make some! Happy New Year!

-Heidi
----------------------------------
Follow me! Did you enjoy this post? Do me a favor and share it with your friends! And follow this blog by signing up for my email updates here, and follow me on TPT! I'm also on Pinterest, Facebook, Twitter, Instagram, and YouTube, too! Don't forget to sign up for our email newsletter for special deals and promo codes that you won't find out about anywhere else.


